Design Inspiration: Design & Illustration

I think I might make a feature out of this so I can share the awesome arty things I find around the web over the course of the week. Usually there’s tonnes of stuff that I find and love and have a folder full on my computer that’s just there for me to ooh and ahh at. This week though I was blown away by this…

Design
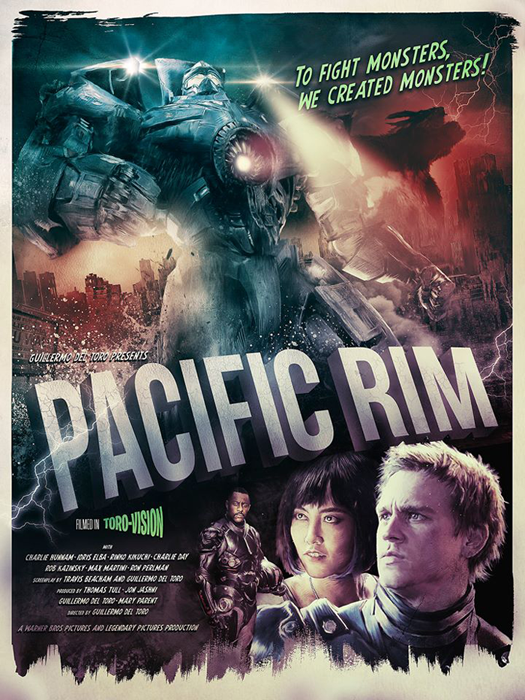
Pacific Rim
This awesome Pacific Rim poster harks back to the earlier poster styles of the 40’s, 50’s and 60’s that I love and wish more folk would do these days. It’s the perfect style as it links back to old sci fi B-movies which I think works so well as Pacific Rim looks like it’s going to be the most expensive B-movie of all time, and I mean that in a good way. It’s going to be fun, action packed, not take itself too seriously and the fx look incredible. Yes, I love special effects and no they don’t “ruin movies”.
I found it over at the Poster Posse on Blurppy.com and it is designed by Richard Davies, an incredible artist who has done so many awesome poster artworks. Check out his site for more…

Illustration

Tiana

I’ve completely forgotten what article I found these on yesterday and I don’t care. I’m just happy I found them. The Historical Disney Princess collection by Claire Hummel (aka Shoomlah) is beautiful especially when you discover how much of Claire’s time and effort has gone in to them. My favourite has to be Tiana as I love the green, the 20’s style, the dress, the movement in her pose and Tiana as a character.  If you’re a Disney fan check them out, you’ll love them too. Also take the time to have a nosey around Claire’s website for more stunning illustration and character design.

Also a little note to Bioshock fans, Claire is also the artist behind Bisohock Infinite’s concept art for Elizabeth and the Luteces – amazing!

Have you seen any stunning artwork this week? Please share in the comments so I can have a wee looksee.

Client Work: Tattoo Design


Designing tattoos for folk means the world to me. I get to translate their feelings, ideas and sometimes memories in to a single design that they can have forever inked on their skin. It’s a big responsibility and I don’t take it lightly. I’ve been responsible for designs that symbolise a loved one lost, the birth of kids, friendship, life loves and so many others and I am so moved by some of the stories that clients tell me when they’re sharing the reasons behind their ink. It’s so rewarding and humbling to be a part of that process and I would like to take the opportunity to say thank you from the bottom of my heart to all of you who have asked me to design for you.

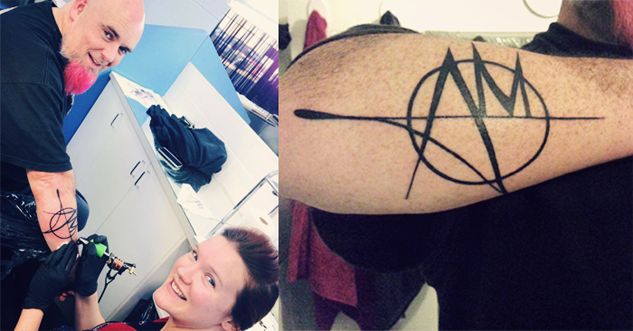
So with all this in mind I like you all to meet Marty, drummer for the Australian band The Eternal, who are awesome by the way {their new single is embedded below}. Marty asked me to design a tattoo that was special to him and his family. This is the second time I’ve designed a tattoo that is now permanently on Marty’s skin. A while ago his brother Dan asked me to design a triskele for them both and I had a lot of fun doing it. I won’t be sharing any of the reasons behind the guy’s tattoos as they’re all very personal to them and I like to keep that a designer/client secret. But I will say I put extra pressure on myself to get that first design perfect and I’m so glad Dan and Marty were happy with it.

This time around Marty asked me to design this one – a symbol that represents a very traditional idea, but wouldn’t be too obvious to figure out. I had loads of fun experimenting with this one as it was totally different to the triskeles I usually get asked to do and let me go nuts with the pencil lines.

The design was inked by Melbourne artist Brittany Kilsby whose work is fantastic and I’m so ridiculously over the moon with the work she did on it. You can see more of Brittany’s work on her Instagram page.

I’ll maybe post in the future about some of my tattoos that have been inked before, but for now you can have a look at some of my previous inked designs on the website. If you’d like a custom tattoo or design for your business, please don’t hesitate to get in touch.

Also, take the time to have a listen to The Eternal’s new track Beneath These Waves, now available over on their Bandcamp page, it’s pretty awesome!

How To: Social Buttons For Blogger

How To: Social Buttons for Blogger

The other day I when looking through some rather lovely blogs I noticed they all had lovely wee social buttons. Well I decided I wanted some so with some trial and error and a tiny bit of HTML know-how I figured it out. It struck me {when I had finished sceaming at the code} just how simple it could be using Adobe Illustrator, Photobucket and Blogger. Hopefully that is made clear in this post which just happens to be my very first tutorial – hopefully of many more to come.


First decide on the look of your buttons make a little sketch time for them – I only wanted circles so I didn’t bother sketching, but if you’re after something a little more fancy then it’s a good place to start.

Once you’ve sketched out your buttons, scan them and open them in Illustrator. {I used Illustrator to create my buttons, but you could also use Photoshop.}

If you don’t want to use the Live Trace or are using Photoshop you can use the pen tool to draw your logos.

Repeat this for all your desired buttons and once you have them all it’s time to get them ready for Blogger.

Now open a new doc in Illustrator to the desired size of your buttons, mine were 40px x 40px. Copy your button from the previous document and rezise them to fit your new artboard.
{You could do this to begin with, but I was just being awkward}

Repeat this for all your buttons and once they are all exported as png files, upload them to your chosen image hosting site – I used Photobucket.

Once you’ve uploaded your images, it’s time to get them on to your blog.

Use this code:< a href=” YOUR WEB LINK” >< img border=”0″src=”YOUR DIRECT IMAGE LINK” />< /a >

Do this for each of your buttons and paste each segment of code in to the gadget box. Hit save and choose where in your layout you want the buttons to go.

If you want to centre them then just add < center> to the very top of the box and </ center>  after all the code.
{if you are copying and pasting the code from here don’t forget to leave out the spaces}

I hope this makes sense. If not and/or if you have any questions please comment below, but be gentle it’s my first tutorial.